


How to Make E-Liquids at Home
Learn how to make your own e-liquids with this easy-to-follow guide. Save money and customize your vaping experience!
For those seeking a more advanced level of customization in their vaping experience, creating e-liquids at home can be an economical and fulfilling endeavor. As an advanced-level enthusiast, you'll appreciate the control and creativity that comes with DIY e-liquid creation. In this blog post, we will guide you through the process of making vape juice from scratch.
We'll start by discussing the necessary equipment for making e-juice, followed by selecting high-quality ingredients such as propylene glycol, vegetable glycerin, and flavorings. Next, we'll cover measuring and mixing techniques to achieve the perfect base mixture for your homemade vape juice.
Additionally, we will explore steeping methods to enhance flavors and storing your e-liquids safely. Finally, troubleshooting common mistakes in DIY vape juice production is essential for achieving optimal results in your vaping experience. By mastering how to make e-liquids at home using these guidelines, you’ll enjoy personalized blends tailored specifically to your preferences.
Table of Contents:
- Gather Necessary Equipment
- Essential Tools and Supplies
- Choose Ingredients
- Measure and Mix
- Steeping E-Liquid
- Store E-Liquid Safely
- Troubleshoot Common Mistakes
- Benefits of Making Your Own E-Liquids
- How to Make E-Liquids at Home
- FAQs in Relation to How to Make E-Liquids at Home
- Conclusion
Gather Necessary Equipment
Before you start making your own e-liquids, it's essential to gather all the necessary equipment. Gathering the right equipment ahead of time can make crafting your own e-liquids much more pleasant and straightforward. In this section, we'll cover everything you need to create your personalized vape juice.
Essential Tools and Supplies
- Digital scale: A precise digital scale is crucial for measuring ingredients accurately. Look for a scale that measures in grams with an accuracy of at least 0.01g. You can find affordable options online or at local stores.
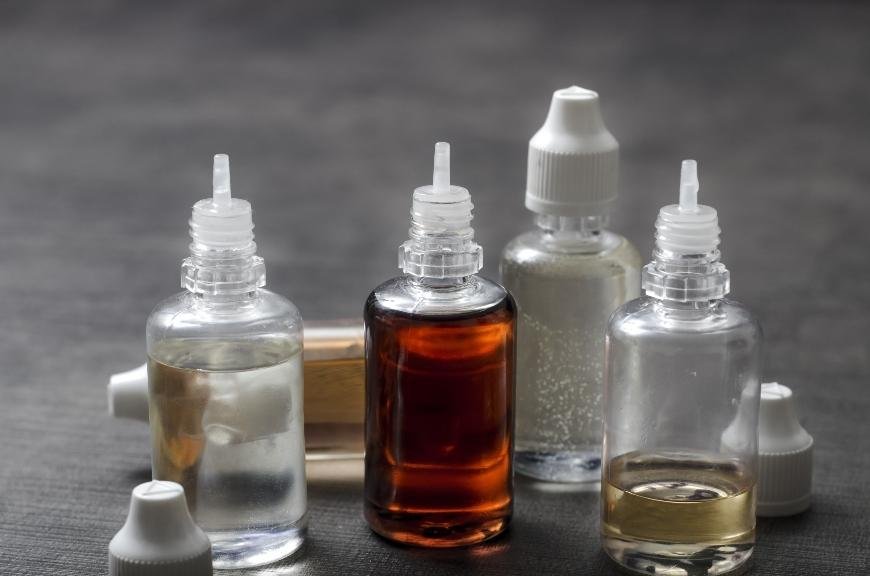
- E-liquid bottles: Purchase empty e-liquid bottles with childproof caps for storing your homemade vape juice safely. You can find e-liquid bottles in different sizes, such as 30ml or 60ml, to suit your desired quantity of homemade vape juice.
- Syringes and pipettes: Use syringes and pipettes to transfer liquids without spills or contamination easily. Different sizes (e.g., 1ml, 5ml) will help measure different ingredient quantities precisely.
- Cleaning materials: Gloves, towels/paper towels, nitrile gloves, mixing containers, and a funnel are all necessary to keep your workspace clean and safe while working with potentially harmful substances.
Choosing Your Ingredients
When it comes to making e-liquids, there are four main ingredients you'll need:
- Base liquid: The base liquid makes up the majority of your e-liquid and is typically a mixture of propylene glycol (PG) and vegetable glycerin (VG). You can adjust the ratio of PG to VG to customize your vaping experience.
- Nicotine: If you want nicotine in your e-liquid, you'll need to purchase a nicotine solution. Be sure to handle nicotine with care and wear gloves to avoid skin irritation.
- Flavorings: Essential oils and food-grade flavorings can be added to your e-liquid to create unique flavors. Be sure to use only high-quality, vape-safe flavorings.
- Distilled water: Distilled water can be added to thin out your e-liquid if it's too thick.
Creating Your E-Liquid
Now that you have all your equipment and ingredients, it's time to start making your e-liquid. Follow these steps:
- Measure your ingredients: Use your digital scale and syringes/pipettes to measure out your base liquid, nicotine, flavorings, and distilled water (if needed).
- Mix your ingredients: Combine your ingredients in a mixing container and stir well. Be sure to mix thoroughly to ensure all ingredients are evenly distributed.
- Bottle your e-liquid: Use a funnel to transfer your e-liquid from the mixing container to your e-liquid bottles. Be sure to label your bottles with the flavor and nicotine strength.
- Steep your e-liquid: Steeping your e-liquid allows the flavors to meld together and can improve the overall taste. Store your e-liquid in a cool, dark place for at least a week before using.
With these steps, you can make your own e-liquids at home and enjoy a customized vaping experience. Remember to handle all ingredients with care and follow safety precautions to ensure a safe and enjoyable DIY vape juice experience.

Choose Ingredients
When making your own e-liquids, it's essential to choose the right ingredients for a satisfying vaping experience. The main components of an e-liquid are:
- Propylene Glycol (PG): A thin, odorless liquid that provides a throat hit similar to smoking cigarettes. It also carries flavor well and is commonly used in food and pharmaceutical products. You can purchase high-quality PG online.
- Vegetable Glycerin (VG): A thicker, sweet-tasting liquid that produces dense vapor clouds when heated. VG is derived from plant oils and is considered safe for consumption.
- Nicotine Base: This ingredient determines the strength of your e-liquid's nicotine content. Nicotine bases come in various strengths and forms like freebase or salt nicotine; make sure you select one suitable for your needs.
- E-Liquid Flavorings: These concentrated flavors give character to your homemade vape juice recipe. Only use food-grade flavorings specifically designed for vaping as some additives may be harmful when inhaled.
Selecting Your E-Liquid Recipe Ratio
The ratio between PG and VG will affect both the throat hit sensation and vapor production levels of your DIY e-liquid mixtures:
- A higher percentage of PG results in stronger throat hits but less visible vapor.
- A higher percentage of VG produces thicker clouds of vapor but a smoother throat hit.
Common ratios include 50/50, 70/30 (VG/PG), and max VG for cloud chasers. Experiment with different combinations to find the perfect balance that suits your preferences.
Finding Flavor Inspiration
Explore the boundless possibilities of e-liquid flavors by experimenting with various combinations to find your perfect blend. From classic tobacco blends to fruity concoctions or dessert-inspired creations, let your imagination run wild. You can start by browsing e-liquid recipe websites for inspiration or even try replicating some popular commercial vape juice flavors.
Remember always to use high-quality ingredients and adhere to safety guidelines when handling nicotine products. With time and trial, you can be crafting your own special DIY e-liquids.
Measure and Mix
Gather your ingredients and follow the steps to mix them together for a custom e-liquid with the desired flavor and nicotine strength. Carefully adhere to the instructions for a seamless vaping experience.
Select Your Recipe
First, choose an e-liquid recipe that suits your taste preferences. There are countless recipes available online for various flavors, ranging from fruity concoctions to dessert-inspired blends. Make sure to note down the required percentages of each ingredient in your chosen recipe.
Determine Nicotine Strength
Next, decide on the nicotine strength you want in your e-liquid. This is usually measured in milligrams per milliliter (mg/mL). If you're new to vaping or looking for a milder experience, consider starting with lower concentrations like 3 mg/mL or 6 mg/mL. For more experienced vapers who prefer stronger hits, opt for higher concentrations such as 12 mg/mL or even 18 mg/mL.
Gather Ingredients and Equipment
- Propylene Glycol (PG): A colorless liquid used as a base in most e-liquids; provides throat hit sensation when vaped.
- Vegetable Glycerin (VG): Another common base ingredient; responsible for producing vapor clouds when exhaled.
- Nicotine Solution: Available in varying strengths; use according to personal preference and desired nicotine concentration.
- Flavor Concentrates: Choose from a wide variety of flavors to create your desired e-liquid taste.
- Syringes and Pipettes: Essential for accurately measuring ingredients during the mixing process.
- E-Liquid Bottles: For storing your finished product; choose bottles with childproof caps for safety purposes.
Mixing Process
To begin, put on gloves and ensure you are working in a clean, well-ventilated area. Follow these steps to mix your e-liquid:
- Determine the total volume of e-liquid you want to make (e.g., 30 mL).
- Using syringes or pipettes, measure out the required amounts of PG, VG, nicotine solution, and flavor concentrates according to your recipe's percentages. Be precise in order to achieve accurate results.
- Pour each ingredient into an empty e-liquid bottle one by one. Make sure not to cross-contaminate syringes or pipettes between different ingredients.
- Once all ingredients have been added, close the bottle cap tightly. Shake vigorously for about 1-2 minutes until thoroughly mixed. This ensures that all components blend together properly, resulting in consistent flavor throughout your vape experience.
Congratulations. You've successfully created your own custom-made e-liquid. Now it's time to steep it for optimal flavor development before enjoying its unique taste profile. Continue reading our guide on best practices when steeping homemade e-liquids below:
Steeping E-Liquid
Once you have mixed your e-liquid, it's essential to steep it for optimal flavor and nicotine content. Steeping is a process of letting the components in your e-juice to combine and mature with time, creating a smoother flavor and more gratifying vaping experience. In this section, we'll discuss how to properly steep your homemade e-liquids.
Why Steeping Matters
Steeping e-liquids allows the flavors to meld together, creating a richer and more complex taste profile. It also helps eliminate any harshness from high-nicotine liquids or unbalanced mixes by giving the ingredients time to settle. Many vapers find that their DIY creations improve significantly after steeping.
The Steeping Process
- Cover and Store: After mixing your e-liquid, transfer it into an appropriate container with a tight-fitting lid (preferably dark glass). Keep the container in a cool, dark place away from direct sunlight or heat sources for at least one week.
- Aerate: Every few days during the steeping period, open the container briefly to allow fresh air inside while gently shaking or stirring its contents. This helps promote oxidation of certain compounds within your mix that can enhance overall flavor development.
- Taste Test: Periodically sample small amounts of your e-liquid throughout its steeping journey using clean equipment like droppers or pipettes - this will help you gauge when it has reached peak flavor maturity without contaminating entire batches. Due diligence is needed here. Remember: patience pays off, so don't rush this process if you want truly satisfying results.
Steeping Timeframes
The ideal steeping time for e-liquids varies depending on the ingredients used and personal taste preferences. Generally, fruit-based tastes necessitate a briefer steeping span (1-2 wks), while dessert or tobacco mixtures may be advantaged by more drawn out periods (2-4 weeks). Experiment with different steeping times to find what works best for your unique recipes and palate.
Speed Steeping Methods
For those in a hurry to sample their DIY e-liquid, there are some speed steeping methods that can help reduce the waiting time for flavor enhancement. While these techniques may not yield identical results compared to traditional slow-steeping, they can still improve flavor profiles in less time:
- Bath Method: Place sealed bottles of e-liquid in a warm water bath (around 40°C) for about an hour, shaking occasionally. This helps expedite ingredient blending by increasing molecular movement within the liquid.
- Rice Method: Microwave uncooked rice until warm but not scorching hot; bury sealed containers of e-liquid inside heated rice bed - let sit undisturbed until cooled down completely before removing & testing juice quality again later on during its life cycle as needed.
- Magnetic Stirrer: Using a magnetic stirrer or similar device can speed up mixing processes considerably when creating new batches at home; however, be cautious since overmixing might lead towards unwanted chemical reactions between various components present throughout each concoction being made here.
Steeping e-liquid is an important step in ensuring a high quality vaping experience. Proper storage of e-liquid is critical for maintaining its quality; here we will discuss the best way to keep it.
Store E-Liquid Safely
Proper storage of your homemade e-liquids is crucial to maintain their quality, flavor, and safety. This piece provides advice on how to store your e-liquid securely and avert any contamination or spoilage.
Choose the Right Container
Selecting an appropriate container for your e-liquid is vital in preserving its freshness. Glass bottles with airtight caps, such as amber or cobalt blue glass dropper bottles, are ideal because they protect against light exposure and minimize air contact. Avoid using plastic containers as they can leach chemicals into the liquid over time.
Avoid Heat and Light Exposure
E-liquids should be stored away from direct sunlight or heat sources like radiators since these factors can degrade the nicotine content and alter the flavors. A cool, dark place like a cupboard or drawer is perfect for storing your homemade vape juice.
Maintain Proper Hygiene Practices
- Cleanliness: Ensure that all equipment used in making e-liquids is thoroughly cleaned before use to avoid introducing contaminants into your mixture.
- Gloves: Wear gloves while handling ingredients to prevent any bacteria transfer from hands to liquids.
- Pipettes/Droppers: Use separate pipettes/droppers for each ingredient when mixing; cross-contamination could ruin both taste and consistency of the final product.
Preserving the quality and strength of your vape juice necessitates proper storage of e-liquid. Knowing how to address issues that may crop up when preparing or utilizing e-juices is essential for successful vaping.
Troubleshoot Common Mistakes
When making e-liquids at home, it's not uncommon to encounter some issues along the way. Here are a few common mistakes and how to fix them:
1. Harsh or Unpleasant Taste
If your homemade e-liquid has a harsh or unpleasant taste, it could be due to several factors. First, check the quality of your ingredients - using expired or low-quality products can negatively impact the flavor. Additionally, ensure that you're using the correct ratios for your PG/VG base and flavorings. If necessary, adjust these ratios and try again.
2. Insufficient Nicotine Strength
If you find that your e-liquid isn't providing enough nicotine satisfaction, double-check your measurements when adding nicotine solution to ensure accuracy. You may also consider increasing the overall nicotine strength in future batches by adjusting the amount of nicotine solution used.
3. Inconsistent Flavor Between Batches
To maintain consistency between different batches of e-liquid, make sure you're measuring all ingredients accurately each time and following any steeping instructions consistently as well (steeping times can vary depending on recipe requirements). Keeping detailed notes on each batch will help identify any discrepancies and allow for adjustments in future mixes.
Tips for Avoiding Common Mistakes:
- Maintain cleanliness: Always clean all equipment thoroughly before use to avoid contamination.
- Use quality ingredients: Invest in high-quality, food-grade flavorings and nicotine solutions to ensure a better final product.
- Measure accurately: Use precise measuring tools like syringes or pipettes for consistent results.
- Keep records: Take notes on each batch you make, including measurements, steeping times, and any adjustments made. By keeping accurate records and making necessary adjustments, you can refine your recipes to create the perfect e-liquid.
Producing homemade e-liquids can be a gratifying and enjoyable task once you've got the fundamentals down. By understanding common mistakes and how to avoid them, you'll be well on your way to creating customized vape juices that suit your preferences perfectly.
Benefits of Making Your Own E-Liquids
Creating your own e-liquids provides a range of advantages, from cost savings to personalization possibilities, that can elevate your vaping experience. From cost savings to customization options, creating DIY e-liquids allows you to take control over the quality and ingredients used in your vape juice.
Cost Savings
A major plus of crafting your own e-juices is the possibility to save money. Commercially available vape juices can be expensive, especially if you consume them regularly. Buying in bulk, like VG, PG, nicotine and flavourings, can result in producing your own e-liquid at a much lower cost than buying pre-made versions.
Control Over Quality and Ingredients
When crafting DIY e-liquids, you have complete control over the quality and ingredients. This means that you can choose high-quality VG, PG, nicotine sources as well as premium-grade flavorings to ensure an enjoyable vaping experience. Additionally, making your own e-liquid allows for transparency in what goes into it - something not always guaranteed when buying pre-made products.
Nicotine Strength Customization
- Tailored Nicotine Levels: With DIY e-liquids, it's easy to adjust the nicotine strength according to personal preferences or needs. Whether reducing intake gradually or maintaining a specific level for satisfaction purposes - customizing homemade vape juice provides the flexibility to do so.
- Smooth Vaping Experience: By controlling nicotine content, you can create a smoother vaping experience with less throat hit or irritation. This is particularly beneficial for those who are sensitive to high-nicotine e-liquids or looking for a more enjoyable vape session.
Unlimited Flavor Combinations
Creating custom flavors is easy with DIY e-liquids, allowing you to mix up your own unique flavor combinations. Experimenting with various flavor profiles, from fruity concoctions to dessert-inspired blends, allows you to craft an e-liquid that perfectly suits your taste buds. Additionally, by mixing your own flavors, you can avoid common additives found in commercial products such as sweeteners and coloring agents.
Eco-Friendly Choice
Making your own e-liquids also contributes positively towards the environment by reducing waste generated from disposable vape juice bottles. Reusing containers for storing homemade vape juices minimizes plastic consumption and helps promote a more sustainable vaping lifestyle.
Now that you know the benefits of making your own e-liquids, let's dive into the process of how to make vape juice at home.
How to Make E-Liquids at Home
Before we get started, let's go over the ingredients you’ll need to make e-liquid at home:
- Base liquid (PG and/or VG)
- Nicotine
- Flavorings
- Distilled water (optional)
It's important to note that nicotine is a powerful substance and should be handled with care. Always wear gloves and work in a well-ventilated area when handling nicotine.
Step 1: Mixing the Base Mixture
The base mixture is the foundation of your e-liquid and consists of PG and/or VG. The ratio of PG to VG will depend on personal preference and the type of vaping device used. A common ratio is 50/50, but some vapers prefer a higher VG content for thicker clouds.
To mix the base mixture, simply measure out the desired amount of PG and VG and combine them in a plastic bottle. Shake the bottle vigorously to ensure the liquids are well mixed.
Step 2: Adding Nicotine
Once the base mixture is prepared, it's time to add nicotine. Measure out the desired amount of nicotine and add it to the plastic bottle containing the base mixture. Again, shake the bottle well to ensure the nicotine is evenly distributed.
Step 3: Adding Flavorings
After adding nicotine, it's time to add flavorings. There are countless flavorings available, from fruity to dessert-inspired. Start with a small amount of flavoring and gradually add more until the desired taste is achieved. Remember to shake the bottle well after each addition of flavoring.
Step 4: Adding Distilled Water (Optional)
If the e-liquid is too thick, distilled water can be added to thin it out. This step is optional and should be done sparingly to avoid diluting the flavor. Add a few drops of distilled water at a time and shake the bottle well to ensure the liquids are well mixed.
Step 5: Steeping the E-Liquid
After the e-liquid is mixed, it's time to let it steep. Steeping allows the flavors to blend together and mature, resulting in a more flavorful vaping experience. Place the e-liquid in a cool, dark place for a few days to a few weeks, shaking the bottle daily to ensure the liquids are well mixed.
And there you have it - a simple guide on how to make e-liquid at home. With a little practice and experimentation, you can create your own unique and delicious homemade vape juice.
FAQs in Relation to How to Make E-Liquids at Home
Is it Legal to Make Your Own E-Juice?
Making your own e-juice is generally legal, but regulations vary depending on the country or state you reside in. It's essential to research and follow local laws regarding nicotine handling and sales. Some areas may require a license for manufacturing e-liquids containing nicotine.
What are the Ingredients for Making E-Juice?
The primary ingredients needed for making e-juice include propylene glycol (PG), vegetable glycerin (VG), flavorings, and optionally, nicotine. You can also add distilled water if necessary to adjust the consistency of the liquid.
What are the Four Ingredients Typically Found in Vaping Liquids?
Vaping liquids usually contain four main components:
- Propylene Glycol (PG)
- Vegetable Glycerin (VG)
- Nicotine
- Flavorings
What are Five Chemicals Found in E-Liquid?
E-Liquids commonly consist of these five chemicals:
- Nicotine - an addictive stimulant derived from tobacco plants
- Diacetyl - used as a buttery flavoring agent
- Acetyl Propionyl - another flavoring agent often used as an alternative to diacetyl
- Glycerol - a sweet-tasting alcohol compound present in VG
- Linalool - a naturally occurring terpene that adds floral notes to flavors
How to Make E-Liquids at Home
If you're interested in making your own e-liquid, here's a step-by-step guide:
- Step 1: Gather the necessary ingredients, including PG, VG, flavorings, and nicotine (if desired).
- Step 2: Mix the base liquid by combining PG and VG in a ratio that suits your vaping experience. A common ratio is 50/50, but you can adjust it to your preference.
- Step 3: Add flavorings to the base mixture. You can use essential oils or flavor concentrates specifically designed for e-liquids.
- Step 4: If you're using nicotine, add it to the mixture. Be sure to handle it with care and follow safety guidelines.
- Step 5: Shake the mixture well and let it steep for a few days to allow the flavors to blend together.
- Step 6: Test the e-liquid and adjust the flavor or nicotine levels as needed.
- Step 7: Transfer the e-liquid to multiple bottles for storage. It's best to use plastic bottles with dropper tips for easy dispensing.
Remember to handle all ingredients with care and follow safety guidelines when making e-liquids at home. Enjoy your homemade vape juice and experiment with different flavor combinations to find your perfect blend.
Conclusion
Creating your own vape juices can be a creative and enjoyable activity, provided that you have the necessary supplies, use quality ingredients, measure accurately, mix carefully, steep correctly and store safely. By gathering the necessary equipment, choosing high-quality ingredients, measuring and mixing carefully, steeping properly, and storing safely, you can create unique vape juices that enhance your vaping experience. Troubleshooting errors is a key part of the DIY e-liquid process - don't overlook it!


