


How to Grow Yerba Maté
Learn how to grow Yerba Maté with our beginner's guide, covering plant selection, soil preparation, planting, watering, pruning and harvesting.
If you're keen to learn how to cultivate Yerba Maté, this comprehensive guide is the ideal resource. Cultivating your own yerba mate plant can be a rewarding experience, as it not only provides an endless supply of the invigorating green tea but also allows you to appreciate its unique characteristics.
In this blog post, we will cover essential aspects such as choosing the right yerba maté plant and preparing the soil for optimal growth. We'll also discuss planting techniques, watering and fertilizing tips, pruning and training methods, pest control measures, and finally harvesting your precious yerba mate leaves.
By following our expert advice on how to grow Yerba Maté successfully at home or in a garden setting, you'll soon enjoy the benefits of freshly harvested leaves infused with rich flavors that surpass store-bought alternatives.
Table of Contents:
- Choosing the Right Yerba Mate Plant
- Preparing the Soil
- Watering and Fertilizing
- Pruning and Training
- Pest Control
- Harvesting Yerba Mate
- FAQs in Relation to How to Grow Yerba Maté
- Conclusion
1. Choosing the Right Yerba Mate Plant
For those looking to cultivate Yerba Mate, selecting the appropriate plant is an essential step. There are two main types of Yerba Mate plants: Ilex paraguariensis and Ilex tarapotina. The most common variety is Ilex paraguariensis, which produces a more potent brew with higher caffeine content.
When selecting a plant, consider factors such as climate, available space, and desired flavor profile. For example:
- Climatic conditions: Yerba Mate thrives in subtropical climates with mild temperatures and high humidity levels. If you live in an area with colder winters or hot summers, opt for hardier varieties like Ilex tarapotina that can better tolerate temperature fluctuations.
- Space requirements: While these plants can be grown indoors or outdoors, they require ample room to spread their roots and branches. Ensure you have enough space before committing to growing this unique crop.
- Taste preferences: Different varieties produce distinct flavors ranging from bitter to sweet; research each type's characteristics before making your decision.
When choosing the right yerba maté plant, it is important to consider factors such as climate and soil conditions. Now that the selection of your yerba maté plant is done, it's time to get ready for planting by prepping the soil.
2. Preparing the Soil
To ensure successful growth of Yerba Mate, it is crucial to prepare the soil properly. For ideal growth, a combination of loam or sandy loam with compost or aged manure should be used to create soil that is well-draining and rich in organic matter. You can achieve this by mixing loam or sandy loam with compost or aged manure.
Yerba Mate prefers slightly acidic to neutral soil, with a pH level between 6 and 7. To determine your soil's pH, you can use a soil testing kit. If necessary, amend your soil by adding lime (to raise pH) or sulfur (to lower pH).
- Loosen the Soil: Before planting, loosen the top 12 inches of soil using a garden fork or tiller. This promotes better root development and drainage.
- Add Organic Matter: Mix in plenty of compost or aged manure to enrich the soil with nutrients and improve its structure.
- Mulch: After planting, apply a layer of organic mulch around your Yerba Mate plants to help retain moisture and suppress weeds.
In addition to preparing the right type of soil for your Yerba Mate plants, consider factors such as sunlight exposure and proper spacing when selecting their location in your garden.
Preparing the soil is essential for successful yerba maté growth. It's important to ensure that the area chosen has enough drainage and organic matter, as well as a good pH balance. Planting Yerba Maté requires careful attention to detail in order to get optimal results from your crop.
3. Planting Yerba Mate
Planting Yerba Mate is a straightforward process, but it's essential to follow the proper steps for optimal growth and yield. Begin by selecting a suitable location with plenty of sunlight, as these plants thrive in south-facing gardens. It's also crucial to ensure that your chosen spot has well-draining soil.
To plant your Yerba Mate, dig a hole about twice the size of the root ball or container it came in. Gently extricate the plant from its container and settle it into the dug hole, making sure that the top of the root ball is even with the soil's surface. Fill in any gaps around the roots with additional soil and gently firm down to eliminate air pockets.
If you're planting multiple Yerba Mate plants, space them at least 5-6 feet (1.5-2 meters) apart to allow room for growth and prevent overcrowding. Once planted, water thoroughly to help establish strong roots early on.
The best time for planting this versatile herb is during spring or fall when temperatures are mild. However, if you live in an area with year-round warm weather like Southern California, you can plant anytime throughout most seasons.
Planting Yerba Maté is a rewarding experience that can lead to the enjoyment of its unique flavor and health benefits. With proper care, your plants will thrive; next up we'll discuss how to water and fertilize them for optimal growth.
4. Watering and Fertilizing
Proper watering and fertilization are essential for the healthy growth of your Yerba Mate plants. Check the soil's moisture level regularly to ensure it is moist, yet not waterlogged. To achieve this balance, you can use a moisture meter or simply check the top inch of soil with your finger. If it feels dry, give your plant some water.
Ideally, you should water Yerba Mate plants once every two days during hot weather and reduce frequency as temperatures cool down. Be sure to adjust based on rainfall in your area as well.
- Fertilizer: Yerba Mate thrives when provided with balanced nutrients throughout its growing cycle. Use an organic fertilizer like compost tea or worm castings every four weeks during active growth periods (spring through fall).
- Nutrient requirements: These plants require high levels of nitrogen (N), phosphorus (P), potassium (K) - often referred to as NPK - along with micronutrients such as magnesium, calcium, iron, and zinc.
- pH level: Maintain a slightly acidic pH between 6-7 by using sulfur-based amendments or lime depending on whether you need to lower or raise the pH, respectively (source).
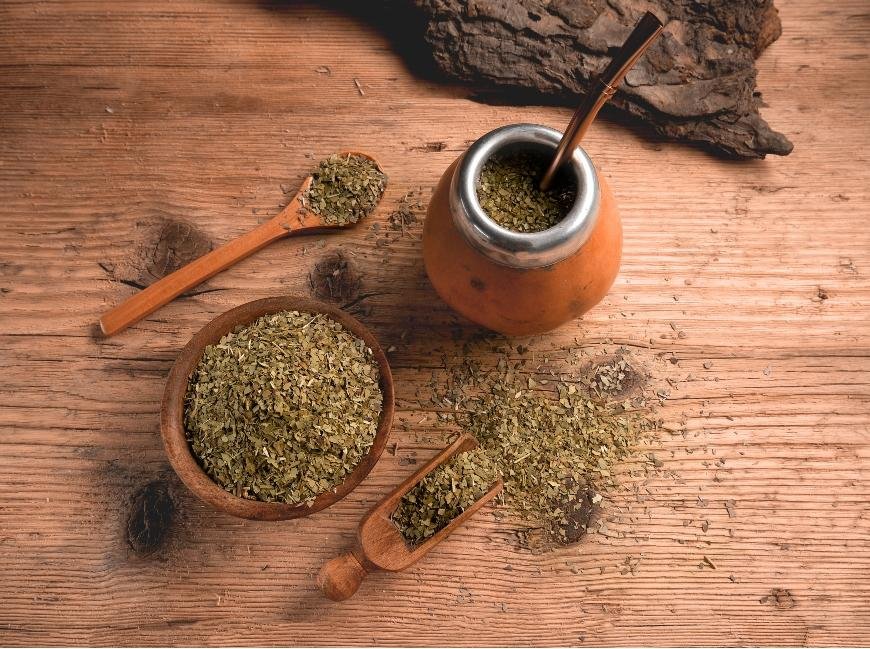
Incorporating these watering and fertilizing practices will ensure that your Yerba Mate grows strong and healthy, producing a bountiful harvest. Yerba Mate is a great alternative to green tea, and with this growing guide, you can easily grow your own yerba mate plant from yerba mate seeds or yerba mate leaves.
Proper watering and fertilizing of yerba maté plants is essential for optimal growth. Pruning and training are the next steps in ensuring a healthy, thriving crop.
5. Pruning and Training
Growing a healthy Yerba Mate plant requires proper pruning and training techniques to ensure optimal growth and yield. This section will look at a range of approaches, such as topping, pinching, staking and trellising.
Topping
Topping involves cutting off the main stem's growing tip to encourage lateral branching. This results in a bushier plant with more leaves for harvest. Perform topping when your Yerba Mate reaches around 12 inches in height by carefully snipping off the top inch of growth.
Pinching
Pinching is similar to topping but involves removing only the very tip of new shoots using your fingers or small scissors. This method also promotes lateral branching while maintaining a compact form ideal for indoor cultivation or limited space gardens.
Staking or Trellising
To provide additional support for taller plants, consider staking or trellising. Stakes can be inserted into the soil near each plant's base, then gently tie stems to them using soft twine or garden tape. Alternatively, use trellises placed alongside rows of Yerba Mate plants so they can climb up on their own accord.
Pruning and training your yerba maté plants is essential for optimal growth, health, and yield. To ensure the success of your crop, it is prudent to be cognizant of pest control strategies that can help safeguard them from potential hazards.
6. Pest Control
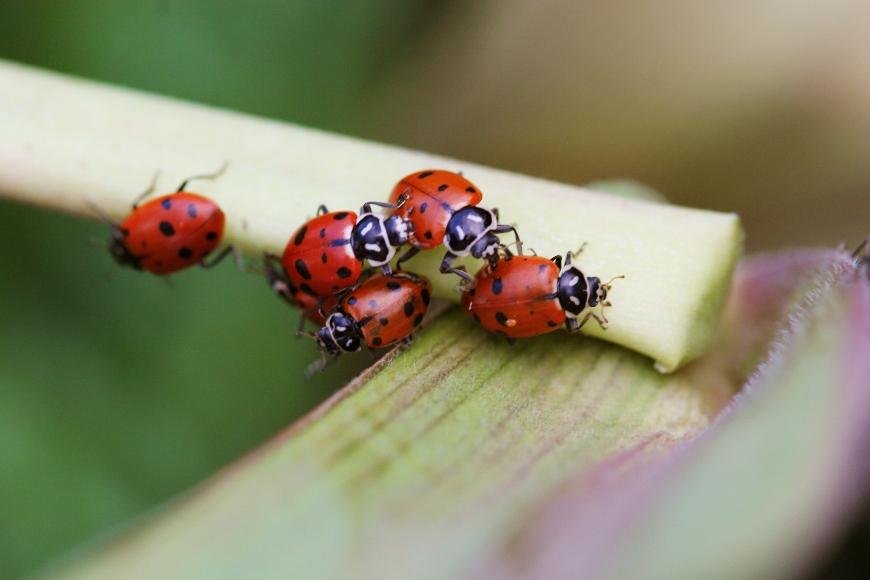
Growing Yerba Mate can sometimes attract unwanted pests, but there are natural methods to keep them at bay without resorting to harsh chemicals or pesticides. One of the most effective ways is by introducing beneficial insects into your garden that prey on common pests.
- Ladybugs: These colorful beetles feed on aphids and other soft-bodied insects, helping to protect your Yerba Mate plants from damage.
- Lacewings: Green lacewings are voracious predators of many small pests, including aphids and whiteflies.
- Predatory mites: Introducing predatory mites can help control spider mite infestations that may affect your plants.
Besides beneficial insects, you can also use organic pest control products like neem oil or insecticidal soap as a preventative measure against potential threats. Regularly inspecting your plants for signs of pest activity is crucial in catching problems early before they become severe. If you notice any issues with your Yerba Mate plant's health, take action immediately using these natural solutions to ensure a successful harvest.
Pest control is an important step in ensuring a successful yerba maté harvest. Now, let's move on to harvesting yerba maté - the final stage of this process.
7. Harvesting Yerba Mate
Harvesting your Yerba Mate plants at the right time is crucial for ensuring a high-quality yield. It typically takes three to four years after planting before the leaves of your Yerba Mate plant can be harvested.
A. Determining When to Harvest
To determine if your Yerba Mate is ready for harvest, look for mature leaves that are dark green and have a leathery texture. The best time to harvest is during the dry season, as this allows the leaves to dry properly without the risk of mold or rot.
B. Picking and Drying Leaves
Pick only healthy-looking mature leaves by hand, leaving younger ones on the plant so they can continue growing. After picking, spread out the harvested leaves in a shaded area with good air circulation for around 48 hours. This initial drying process will help prevent any fermentation that could affect flavor.
C. Final Preparation and Storage
Once dried, gently crush or grind the leaves into smaller pieces using a mortar and pestle or food processor - but be careful not to over-process them. Store your prepared Yerba Mate in an airtight container, away from direct sunlight and moisture, where it will last up to two years while maintaining its potency.
If you're interested in growing your own Yerba Mate, check out our growing guide for tips on how to easily grow Yerba Mate from seeds or dried stems. Yerba Mate trees can be a great addition to any garden, and the leaves can be brewed into a delicious tea that's packed with health benefits. Yerba Mate is often compared to green tea, but it has a unique flavor and caffeine content that sets it apart.
FAQs in Relation to How to Grow Yerba Maté
How to Grow Yerba Mate: A Comprehensive Guide
Yerba mate is a popular South American drink made from the leaves of the yerba mate tree. If you're a fan of this delicious beverage, you might be interested in growing your own yerba mate plant. Here's a guide to help you easily grow yerba mate at home.
What You Need to Grow Yerba Mate
Before you start growing yerba mate, you'll need to gather the following materials:
- Yerba mate seeds or cuttings
- Well-draining, fertile soil with a pH between 6 and 7
- Partial shade to full sun
- Consistent watering and fertilization
- Pruning shears
- Pest control measures
How to Grow Yerba Mate
Follow these steps to grow yerba mate:
- Choose a location with well-draining, fertile soil and partial shade to full sun.
- Plant yerba mate seeds or cuttings in the soil and water regularly.
- Fertilize the plant every few months with a balanced fertilizer.
- Prune the plant to maintain its shape and promote healthy growth.
- Protect the plant from common pests like aphids with pest control measures.
How Long Does It Take to Grow Yerba Mate?

It takes approximately three years for a yerba mate plant to reach maturity and produce harvestable leaves. During this time, proper care including regular watering, fertilizing, pruning, and pest control should be maintained for optimal growth.
How to Harvest Yerba Mate at Home
Once your yerba mate plant has reached maturity, you can harvest its leaves for consumption. Here's how:
- Wait until the plant reaches maturity (around three years).
- Carefully pluck mature leaves by hand or use sharp shears to remove branches containing healthy leaves.
- Dry the harvested leaves either naturally under sunlight or using an oven on low heat.
- Grind the dried leaves into powder for consumption.
Now that you know how to grow yerba mate, you can enjoy this delicious drink from the comfort of your own home. Yerba mate is a great alternative to coffee or green tea, and it's packed with antioxidants and other health benefits. Happy growing.
Conclusion
In conclusion, growing Yerba Mate can be a rewarding experience for those who enjoy gardening and want to try something new. By choosing the right plant, preparing the soil, planting correctly, watering and fertilizing appropriately, pruning and training regularly, controlling pests effectively, and harvesting at the right time, you can have a healthy yield of this popular South American drink.
So why not give it a try? With patience and dedication to following the steps outlined in "How to Grow Yerba Mate," you'll soon have your own supply of fresh yerba mate leaves that you can use to make tea or share with friends.


