


How to grow Kanna
Learn how to grow Kanna with our comprehensive guide, covering plant selection, growing tips, and harvesting for maximum potency. Master Kanna cultivation!
Learning how to grow kanna is an exciting and rewarding experience for those interested in cultivating this unique succulent plant native to South Africa. As a young adult exploring the world of recreational plants, you'll find that growing kanna can be both enjoyable and beneficial.
In this comprehensive guide on how to grow kanna, we will delve into the various aspects of cultivating these fascinating plants. We will start by discussing how to choose the right kanna species and variety for your needs, as well as where to purchase high-quality plant material or seeds.
Next, we will cover preparing the ideal growing area by addressing soil requirements, sunlight exposure, and watering frequency. Afterward, our focus shifts towards planting instructions and essential care tips such as fertilizing and pruning techniques for optimal growth.
Lastly, we will explore harvesting methods that ensure maximum potency from your grown outdoors kanna plants while providing insights on drying, storing processes along with extracting essential oils from their leaves.
Table of Contents:
- Choosing the Right Kanna Plant
- a. Identifying Kanna Species
- b. Selecting the Right Variety for Your Needs
- Preparing the Growing Area
- Planting and Caring for Kanna Plants
- Harvesting Kanna Plants
- Frequently Asked Questions How to Grow Kanna
- Conclusion
1. Choosing the Right Kanna Plant
If you're interested in growing kanna (Sceletium tortuosum) at home, it's essential to choose the right plant variety and source your plants from a reputable supplier. In this article, we'll explore how to discern different species of kanna plants, pick the most suitable one for your purposes and locate reliable sources from which to purchase them.
a. Identifying Kanna Species
Kanna is native to South Africa and belongs to the Aizoaceae family. There are several species within this genus; however, Sceletium tortuosum is the most popular due to its psychoactive properties that provide relaxation and mood-enhancing effects when consumed responsibly.
To correctly identify Sceletium tortuosum, look for succulent-like leaves with a smooth texture that grows in pairs along an elongated stem. The flowers are small with white or pale yellow petals surrounding a central cone-shaped structure.
b. Selecting the Right Variety for Your Needs
When choosing which kanna plant variety suits your needs best, consider factors such as potency levels and ease of cultivation:
- Potency: Some varieties may have higher alkaloid content than others - these compounds contribute significantly towards kanna's psychoactive effects. Research different strains before making a decision on which one will suit your preferences best.
- Ease of Cultivation: While all kanna plants require similar care conditions like sunlight exposure and watering frequency, some varieties might be more resilient against pests or diseases than others - making them easier for novice growers who want low-maintenance options.
c. Where to Buy Kanna Plants
Finding a reliable source for kanna plants is crucial to ensure you receive healthy, high-quality specimens. Here are some options:
- Online Nurseries: Many reputable online nurseries specialize in exotic and rare plants, including kanna. Look for sellers with positive reviews and transparent shipping policies to avoid disappointment.
- Ethnobotanical Stores: Some stores dedicated to the sale of ethnobotanicals may also stock live kanna plants or seeds. These establishments often have knowledgeable staff who can provide valuable advice on plant care and cultivation.
In addition to purchasing established plants, you can also buy kanna seeds from trusted suppliers if you prefer starting your growing journey from scratch. Make sure to follow germination instructions carefully for successful sprouting.
Choosing the right kanna plant is essential for a successful and productive grow. With proper preparation of the growing area, your plants will be well on their way to thriving.
2. Preparing the Growing Area
Growing kanna plants successfully requires attention to detail when it comes to preparing their growing environment. In this section, we'll discuss soil requirements and preparation, sunlight requirements and positioning of plants, as well as water requirements and frequency of watering.
a. Soil Requirements and Preparation
Kanna plants prefer a slightly acidic soil with a pH of 6.0-7.5 that drains well. A mix of potting soil, perlite or sand can provide the ideal balance for your plant's growth needs (source). To prepare the soil for planting:
- Mix equal parts potting soil, perlite or coarse sand.
- Add organic matter such as compost or aged manure if desired.
- Adjust pH levels using lime (to raise) or sulfur (to lower) if necessary.
b. Sunlight Requirements and Positioning of Plants

Kanna plants need plenty of sunlight to grow healthy; they prefer full sun exposure but can tolerate partial shade. When selecting a location for your kanna plant:
- Choose an area that receives at least 6 hours of direct sunlight daily.
- If growing indoors, place near a south-facing window with ample light exposure throughout the day.
- Ensure there is enough space between plants to prevent overcrowding and allow for proper air circulation.
c. Water Requirements and Frequency of Watering
Kanna plants are drought-tolerant but still require regular watering, especially during the growing season (source). To maintain optimal moisture levels:
- Water deeply when the top 1-2 inches of soil feels dry to touch.
- Avoid overwatering as it can lead to root rot; always ensure that excess water drains away from the plant's roots. Allow soil to dry out slightly between waterings during dormant periods (winter months). Monitor humidity levels in your growing area, as kanna plants prefer moderate humidity around 40-60 % RH( source ).
Preparing the growing area is essential for a successful kanna crop, as it sets the foundation for healthy growth. With that in mind, we now move on to planting and caring for your kanna plants - an equally important step in ensuring success.
3. Planting and Caring for Kanna Plants
Cultivating kanna plants can be an incredibly satisfying venture, particularly when you are familiar with the right way to plant and take care of them. In this part, we will explore the techniques for planting and sustaining a flourishing kanna plant, including fertilizing and pruning practices for optimum growth, as well as common infestations and their remedies.
a. Planting Instructions and Tips for Successful Growth
To start your kanna journey on the right foot, follow these simple steps:
- Choose healthy seedlings or cuttings: Start with strong seedlings or cuttings from a reputable source.
- Plant in prepared soil: As mentioned earlier in the article (see Section 2), ensure that your soil is well-draining with added organic matter.
- Sunlight exposure: Position your kanna plants where they will receive at least six hours of direct sunlight daily.
- Maintain proper spacing: Space your plants about one meter apart to allow adequate room for growth.
b. Fertilizing and Pruning Tips for Healthy Growth
Kanna plants require regular care to maintain their health throughout their growing cycle. Here are some essential tips on fertilizing and pruning:
- Fertilize regularly: Add an all-purpose fertilizer every four weeks during the growing season according to package instructions.
- Avoid over-fertilization: This may cause excessive foliage growth at the expense of flower production. Stick to the recommended dosage on your fertilizer package.
- Prune regularly: Trim back any dead or damaged leaves and stems to encourage new growth and prevent diseases from spreading. A simple guide can help you with proper pruning techniques.
c. Common Pests, Diseases, and Solutions to Combat Them
Kanna plants are generally hardy but may still fall victim to certain pests and diseases. Here's how you can protect your kanna plants:
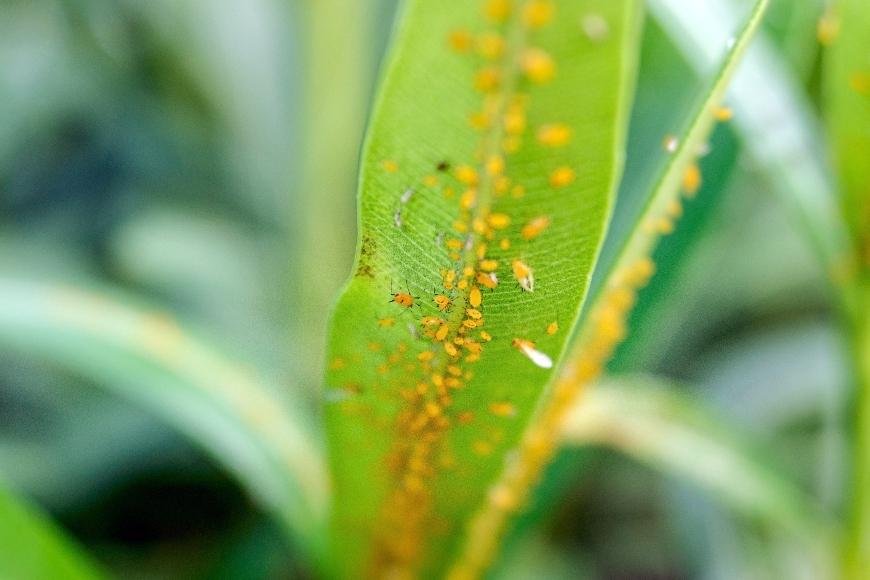
- Aphids: These small insects feed on plant sap, causing distorted growth in leaves and flowers. You can control aphids by spraying them off with water or using a natural insecticide like neem oil.
- Powdery mildew: This fungal disease appears as white powdery spots on leaves that eventually turn yellow and die off. Prevent it by providing good air circulation around your plants, avoiding overhead watering, and applying a fungicide if necessary.
- Rust fungus: Rust-colored spots appear on the undersides of leaves due to this fungus infection which weakens the plant over time if left untreated. Remove infected parts immediately; apply an appropriate fungicide following label instructions for prevention or treatment when needed.
Maintaining healthy growing conditions is key in preventing most pest infestations or diseases from affecting your kanna plants.
With the right amount of care and attention, Kanna plants can be successfully grown for a variety of uses. Now that we have discussed planting and caring for Kanna plants, let's move on to harvesting them in order to maximize their potency.
4. Harvesting Kanna Plants
Once you've tended to your kanna plants, it's time to reap the rewards of your hard work by harvesting them. In this section, we will discuss how to determine the best time for harvesting kanna plants, as well as proper drying and storage techniques. Additionally, we'll explore extracting essential oils from kanna leaves.
a. Timing of Harvest for Maximum Potency
The ideal time to harvest your kanna plants is crucial in order to achieve maximum potency and effectiveness of its active compounds like mesembrine and mesembrenone. Generally speaking, you should wait until the plant has reached full maturity before harvesting - this usually occurs around 4-6 months after planting or when flowers start appearing on the plant.
To ensure optimal potency during harvest:
- Harvest early in the morning or late afternoon when temperatures are cooler.
- Avoid harvesting during rainy days or periods with high humidity levels.
- Pay attention to signs that indicate peak alkaloid content such as yellowing leaves or wilting flowers.
b. Properly Drying and Storing the Harvest
Drying your harvested kanna is an important step in preserving its quality and ensuring long-lasting effects when consumed later on. To properly dry your harvested material:
- Cut off any roots attached to stems/leaves if present; these do not contain significant amounts of active compounds and may introduce contaminants into your final product if left untrimmed.
- Herbalistics provides a detailed guide on drying herbs, which can be applied to kanna as well. In summary, spread the harvested material evenly on a drying rack or screen in a well-ventilated area with low humidity and indirect sunlight. Rotate the material every 1-2 days to ensure even drying; this process should take approximately 7-10 days depending on environmental conditions.
Once your kanna is thoroughly dried, store it in an airtight container away from direct sunlight and extreme temperatures. This will help preserve its potency for up to two years.
c. Extracting Essential Oils from Kanna Leaves
Kanna leaves contain essential oils that offer various therapeutic benefits when extracted properly. To extract these oils:
- Finely grind your dried kanna leaves using a mortar and pestle or electric grinder.
- Mix the ground-up plant material with high-proof alcohol (such as Everclear) at a ratio of about 1:5 (plant material:alcohol).
- Cover the combination and let it steep for a minimum of two weeks, occasionally shaking to promote extraction.
- WikiHow provides detailed instructions on making herbal tinctures, including straining out solids after extraction is complete.
The resulting liquid contains concentrated essential oils along with other active compounds found in kanna plants - this can be consumed directly under the tongue or mixed into beverages like tea for consumption purposes.
Frequently Asked Questions How to Grow Kanna
How do you plant kanna?
To plant kanna, first prepare the soil by mixing it with perlite or sand to improve drainage. Plant seeds or cuttings about 1 cm deep in well-draining soil and water them gently. Keep the plants in a sunny location with temperatures between 15-30°C (59-86°F). Germination should occur within two weeks.
How do you take care of kanna?
Caring for kanna involves providing proper sunlight, watering regularly but not excessively, and using a balanced fertilizer every few months. Prune your plants occasionally to encourage bushy growth and remove dead leaves. Monitor for pests like aphids and mealybugs, treating them promptly if necessary.
How do you grow Sceletium tortuosum?
Growing Sceletium tortuosum is similar to growing other types of kanna plants: provide well-draining soil mixed with perlite or sand; ensure adequate sunlight exposure; maintain moderate temperature conditions; water appropriately without overwatering; apply balanced fertilizer periodically; prune as needed for healthy growth; monitor for pests and diseases.
Is kanna a perennial?
Kanna is considered a perennial succulent herbaceous plant that can survive multiple years under suitable growing conditions. However, its hardiness varies depending on species and climate factors such as frost tolerance may affect its ability to thrive year-round in certain regions.
Conclusion
Growing kanna is a rewarding and enjoyable experience that can provide you with a sustainable supply of this valuable plant. By following the advice in this guide, you can confidently cultivate your own kanna plants and benefit from their rewards. With proper care and attention, these hardy plants are sure to thrive. So why not give it a try? Start growing your own Kanna today - you won't regret it.


