


How to Cure Cannabis Buds
Learn how to cure cannabis buds with our guide on timing, monitoring maturity, and techniques for top-quality results.
To create the best possible cannabis, one must master the art of curing buds - a key factor in achieving optimal flavor and potency. Proper curing not only enhances the flavor and aroma of your buds but also helps preserve their potency for an extended period. In this blog post, we will delve into the art of curing cannabis and provide you with valuable insights to perfect your technique.
We'll start by understanding the basics of curing cannabis buds, including its importance in maintaining quality and preventing mold growth. Next, we'll discuss how timing plays a significant role in harvesting and why monitoring maturity is essential for achieving optimal results.
Furthermore, you'll learn about harvesting without causing damage to your precious plants while exploring various drying and curing techniques that cater to different preferences. By mastering these skills, you can ensure that your cured cannabis flowers offer an exceptional experience every time.
Table of Contents:
- Understanding the Basics of Curing Cannabis Buds
- Harvesting Without Damage
- Timing is Everything
- Monitoring Maturity
- Drying and Curing Techniques
- FAQs in Relation to How to Cure Cannabis Buds
- Conclusion
Understanding the Basics of Curing Cannabis Buds
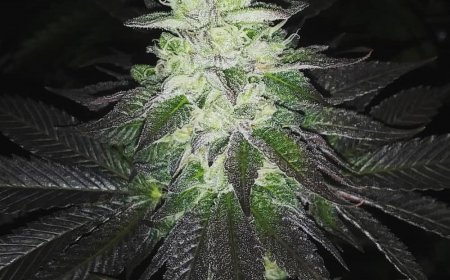
Curing cannabis buds is an essential step in the cultivation process. Curing cannabis buds can help to maximize the sensory experience, both in terms of taste and potency, as well as reduce harshness when consuming. Proper curing can also help reduce harshness when smoking or vaping cannabis. In order to get the most out of your harvest, it’s important to understand how to properly cure your buds.
The first step in curing cannabis is harvesting without damage. This means cutting down your plants at just the right time so that you don’t cause any unnecessary stress on them during harvest. You should wait until all of the trichomes have turned milky white before cutting down your plants for maximum potency and flavor potential.
Harvesting Without Damage
Harvesting cannabis buds without damaging them is an essential step in preserving the quality of your crop. It's important to understand how to properly harvest and dry buds, as improper techniques can lead to poor results and wasted time.
Monitoring Maturity:
The first step in harvesting without damage is monitoring the maturity of your plants. You can identify when your plants are ready for harvest by observing the trichomes on their flowers, which will change from clear to milky white or amber as they mature. Trichomes are small, clear hairs that appear on mature buds; when they turn from clear to milky white or amber, it’s a sign that your plant has reached peak maturity and is ready for harvest. Additionally, you can check for pistils—the tiny red or orange hairs covering the surface of each bud—which will start curling up once the plant has matured enough for harvest.
Understanding the Basics:
Once you have determined that your plants are mature enough, it’s time to begin harvesting them carefully so as not to damage any delicate parts of the flower or reduce its potency or flavor profile. Start by cutting off branches one-by-one with sharp scissors just above where they meet larger stems; this ensures that no part of the bud gets damaged during removal from its stem while also allowing you access more easily into tight spaces between branches where smaller nugs may be hiding.
Cutting Without Damage:
As you cut away branches containing mature buds, take care not to compress them too much as this could cause bruising which would result in lost terpenes (aromatic compounds) leading to diminished flavor and smell profiles upon consumption later down line - something nobody wants. Instead opt for gentle handling when possible and use a pair of tweezers if necessary when dealing with hard-to-reach areas within dense foliage structures such as those found around colas (flower clusters).
Harvesting Whole Plants:
If needed, whole plants can also be harvested all at once instead of piecemeal over several days – however keep in mind that doing so requires extra caution due diligence given its size/weight ratio compared individual branch harvests thus making it prone breakage/damage if done incorrectly. When removing entire plants from their pots make sure handle gently yet firmly while being mindful avoid yanking out roots along way – these contain valuable nutrients vital healthy growth post transplantation so don't want lose any these precious goodies during process either.
Harvesting without damage is an essential step in ensuring that your buds reach their full potential. Accurately determining when to harvest is essential for achieving the desired outcome.
Timing is Everything
Harvesting cannabis buds at the right time is key to preserving their terpene and cannabinoid content. Monitoring the trichomes is essential for determining when it's time to harvest your cannabis buds. Checking the trichomes, which are like tiny crystals on female cannabis plants' flowers, is a great way to determine when it's time for harvesting.
Trichomes can range in hue from transparent or opaque white to golden-hued orange. Once the plant has grown to maturity, trichomes that are transparent signify it's not ready for harvest; whereas ones with an amber or orange hue suggest the time is right. If you wait too long after reaching maturity, however, you risk sacrificing some of its potency as well as flavor profile due to degradation of cannabinoids and terpenes over time.
Another factor that affects timing is whether you want a heady high (from harvesting earlier) or a more body-focused experience (from harvesting later). Early harvests tend to produce higher levels of THC, whereas late harvests will have more CBD present—which may make them better suited for medical users looking for relief without intoxication.
Experimenting with different cultivars of varying maturity can help you gauge the time it takes for each to reach its peak. This way, when they all hit that stage simultaneously, you can reap the rewards of maximum potency and flavor preservation across your entire crop.
Monitoring Maturity
Monitoring the maturity of cannabis buds is an essential step in harvesting them at their peak. Identifying the indications that a bud is ready to be gathered is crucial for a successful harvest. This can be done by examining the color, trichomes, pistils and overall shape of each individual bud.
The most important factor in determining whether or not a bud has reached its full maturity is its color. As the plant matures, it will go from green to shades of purple, blue and even pinkish hues depending on strain genetics. Observe the external and internal elements of each bud to ascertain if they are ready for harvesting - this will aid in discerning whether or not they have achieved their peak maturity.
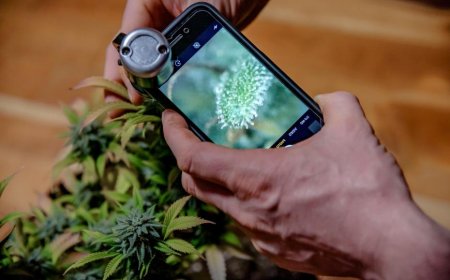
Checking the trichomes (tiny hairs) of your buds under magnification with a microscope or magnifying glass is another way to tell if they've matured correctly. Trichomes contain cannabinoids such as THC which give marijuana its psychoactive effects; therefore they are one of the best indicators that a plant has fully ripened and reached maximum potency levels. If you see clear trichomes then your plants may need more time before they’re ready for harvest; however amber-colored ones usually signify that it’s time.
Observing the density and compactness of each individual nugget is also a key factor in assessing its readiness for harvest; generally, larger flowers are indicative of higher quality. Consequently, it's prudent to keep an eye on this aspect when evaluating your weed's maturity.
In conclusion, monitoring maturity involves looking at several aspects including but not limited to: color change from green into various shades; inspecting trichome clarity under magnification; observing pistil darkening and curling along with overall size/density increase during flowering stages. All of these combined should allow growers to achieve successful harvests every single time.
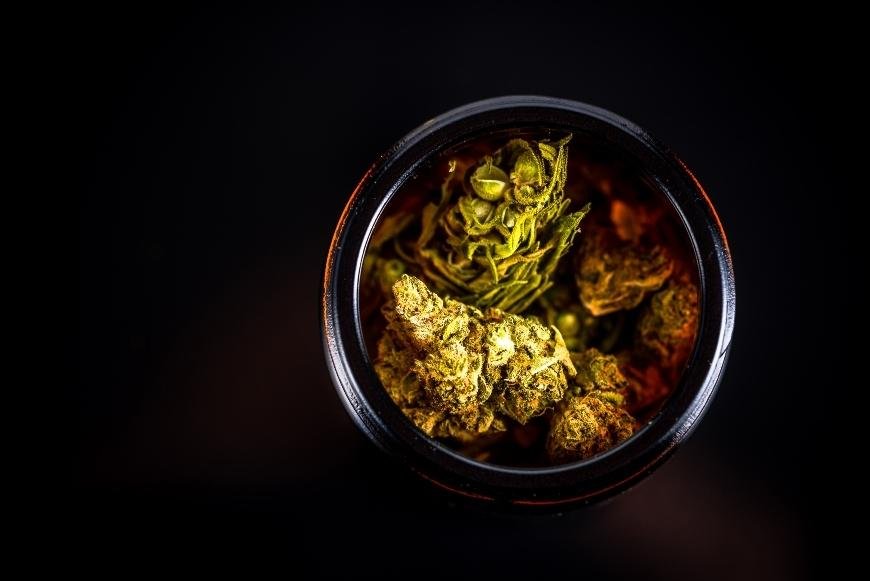
How to Cure Cannabis Buds
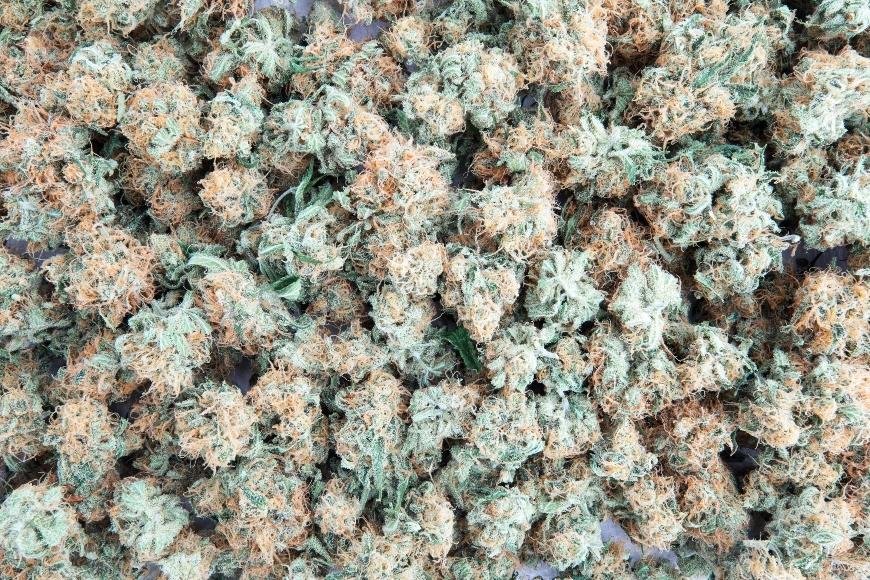
The goal here is to let your buds dry slowly over a period of several weeks while maintaining a consistent humidity level between 45-55%. To do this, you will need a hygrometer or humidity monitor as well as some kind of airtight container such as mason jars with lids that allow for some air exchange but not too much (burping).
By keeping tabs on these two variables throughout the curing process, you can ensure that your buds are drying evenly and slowly which will result in better quality flower overall.
Once you feel like your buds have dried enough (usually around 10-14 days), it’s time for jarring up. Place each bud into its own glass jar with a lid and seal tightly shut; this will create an environment where moisture from inside each bud has nowhere else to go except back into itself – thus creating optimal conditions for further curing over longer periods of time (upwards of 6 months).
During this stage, be sure not to open up jars more than once every few weeks; doing so too often could lead to mold growth due tot he high levels of moisture present within each jarred bud.
By following these steps closely throughout every stage of cultivation – from harvesting without damage through proper monitoring maturity levels – growers can rest assured knowing their hard work won't go to waste when they finally enjoy their perfectly cured cannabis flowers.
Understanding the basics of curing cannabis buds is essential for producing quality product and ensuring a safe, enjoyable experience.
FAQs in Relation to How to Cure Cannabis Buds
How should I cure my bud?
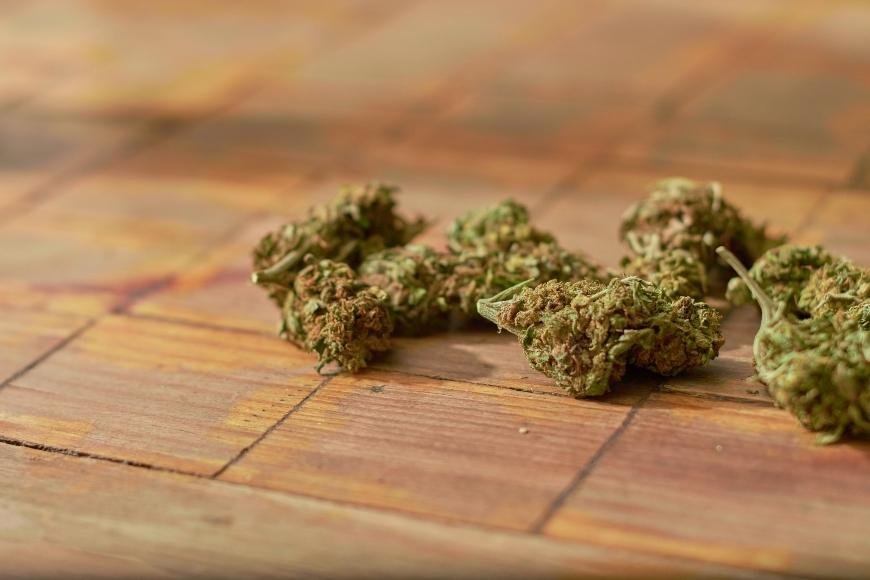
To guarantee the highest caliber of cannabis, curing your buds correctly is imperative. After drying the buds in a cool and dark place until they become crunchy on the outside but still pliable inside, store them in airtight containers at room temperature for 2-4 weeks. Store the buds in sealed receptacles at ambient temperature for two to four weeks so any residual moisture dissipates and terpenes can mature. Finally, check regularly for signs of mold or mildew growth before consuming your buds.
How do you know when to cure buds?
Curing buds is a critical component of the cultivation process that should not be disregarded. To determine when to cure your buds, look for signs of discoloration or changes in texture. Buds are ready to be cured once they have developed a light green color and feel dry but slightly spongy to the touch. The curing process will help improve taste, smell, potency, and overall quality of the final product. It's best practice to start curing as soon as possible after harvesting for optimal results.
How do commercial growers cure buds?
Curing buds is a process that allows for the preservation of cannabis flower and its psychoactive properties. Proper curing involves drying the plant material in an environment with controlled temperature, humidity, and airflow. Storing the dried material in airtight receptacles with temperatures between 15-21°C (60-70°F) and relative humidity levels of 55%-65% is necessary for preserving terpenes and cannabinoids while diminishing moisture content. This helps to reduce moisture content while preserving terpenes and cannabinoids. The curing period for cannabis varies, typically taking anywhere from two weeks to several months.
Conclusion
In conclusion, curing cannabis buds is an important process that requires careful attention to detail. By understanding the basics of timing and monitoring maturity, harvesting without damage and utilizing proper drying techniques you can ensure your bud maintains its terpenes and cannabinoids while providing a pleasant smoking experience. With these tips in mind, you are sure to cure cannabis buds like a pro.

